Naming
Author: Vincenzo Mossuto Creation Date: 26/09/2025
Last Reviewer: Sara Altomare/Rossana Mazza
What it is
This document describes all the scripts in the Naming section included in the Spaarkly Scripts add-on for Blender:
- Rename FULL
- Rename for VTO
- Rename Material
Consistent naming is essential in a collaborative 3D pipeline.
By following the standardized rules described in this documentation, every component, material, and variation of an eyewear model can be easily identified, searched, and reused across different stages of production.
The naming scripts automate this process by reducing human error caused by manual naming. This ensures that all assets remain organized, predictable, and compatible with Spaarkly’s eyewear production pipeline.
See the Naming section for an accurate overview of all the naming rules and guidelines.
Rename FULL
What it does
Standardize object names by component type through a cascade of menus.
Encodes part category, side (DX/SX), collection, brand codes, and the current .blend file name.
Prerequisite
- Only 1 object should be selected.
Steps
1. Select the component and choose its type
Select one object in the scene and pick its main category.

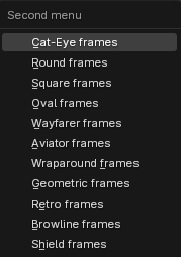
2. Choose the first subcategory
Depending on the first choice, a second menu lets you specify the sub-part.


3. Select the subcategories
Based on the main category, the workflow will present a variable number of additional subcategory menus.
- The type and number of these menus depend entirely on the chosen component.
- In total, there may be as few as two subcategories or up to six.


4. Define the model type
The final subcategory is always the same for all components and specifies where the model should be used:

Troubleshooting
- Ensure the initial file is saved to insert the model name into the component name.
- For decals, check that brand codes are loaded in
csv_data.
Rename for VTO
What is does
Renames cut versions of objects in VTO workflow.
Adds _CUT.001 suffix to retopologized copies.
Prerequisite
- Multiple objects can be selected.
- Only applies if object name already ends with
_RC.
Steps — Rename Cut (VTO)
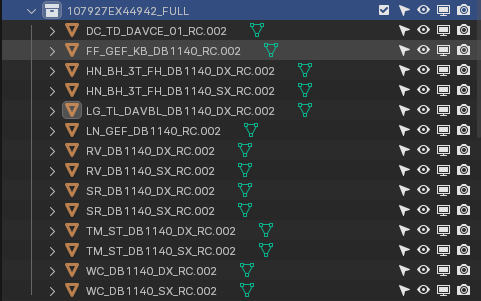
1. Select one or more components
Duplicate the retopologized collection and then select all the new duplicated objects.
2. Run “Rename for VTO”
For each selected object, the operator checks the last characters of the name:
- If the name has
"RC"at positions −6 and −5 (i.e., it matches*_RC.###), it is valid.
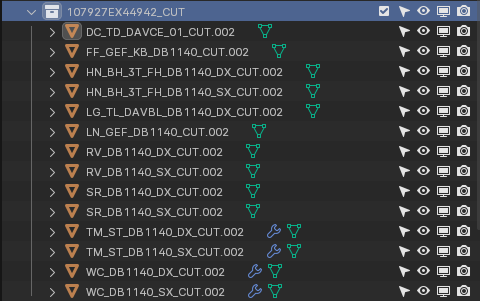
The operator renames it to:
<COMPONENT NAME>_CUT.001
(It removes the trailingRC.###and writesCUT.001.)
3. Result
Valid inputs like TM_DX_RC.001 become TM_DX_CUT.001.
Running it on more collections uses Blender uniqueness naming rule to increment the index of the suffix.
Troubleshooting
- If the name is neither a valid retopo duplicate nor recognized as Original, the operator stops because it needs to have a valid naming structure.
See Naming section. - The operator expects duplicated retopo names in the form:
<COMPONENT NAME>_RC.###(e.g.,FF_GEF_KB_DB1140_RC.002). - If an object ends exactly with
_RC(e.g.,FF_GEF_KB_DB1140_RC.002), the operator stops because it means that the object has not been duplcated, so Duplicate the object first (e.g.,Shift+D) so Blender appends.001. - If the name does not match the
*_RC.###pattern, the code checks if it appears to be an Original Component (by looking for'O'in specific end positions). In that case, it stops because you should not create a vto version of the Original Component, but of the optimized and shaded ones.
Rename Material
What it does
Standardizes material names by category, finish, color family (computed from HSV), metal/brand/pattern codes, and target engine.
Reads the Principled BSDF base color to compute a HEX code and updates viewport preview (diffuse color/alpha, metallic, roughness).
Prerequisite
- Exactly 1 object selected and it must have an active material (with a Principled BSDF).
Steps
1. Start the operator
Run Rename Material with one object selected. The operator validates selection and that an active material exists; otherwise it cancels with an error.
2. Choose the material category
Pick one of: Metal (MT) · Dielectric (DE) · Transmissive (TR) · Lenses (LN) · Decal (DC).
3. Choose the finish (Menu 2, context-dependent)
- Lenses (LN) → Glossy / Metallic
- Decal (DC) → Glossy / Matte / Metallic
- MT / DE / TR → Glossy / Satin / Matte
4. Provide category-specific details (Menu 3)
- Lenses (LN) → Shades: Base Color / Shaded / Special
- Metal (MT) → Metal type: Gold, Ruthenium, Palladium, Stainless steel, Copper
- Decal (DC) → Brand code (from
csv_data) - Dielectric/Transmissive (DE/TR) → Target engine: Model Viewer (MDV) / Virtual Try On(VTO) / 3D Viewer (3DV) / Cycles (CYS)
If an engine is chosen here (DE/TR case), the rename executes immediately.
5. (If prompted) Pick decal pattern or engine (Menu 4)
- Decal (DC) → Pattern code filtered by selected brand
- Others → Engine (MDV / VTO / 3DV / CYS)
Choosing an engine here executes the rename; DC may continue to Menu 5.
6. (Decal only) Select the engine (Menu 5)
Pick MDV / VTO / 3DV / CYS.
7. Name is generated and applied
The script:
- Reads Base Color from Principled BSDF, converts to HEX, and derives a color family from HSV (except MT, which uses the chosen metal type).
- Builds the final name and ensures it’s not already used:
- Metal:
MT_<Finish>_<MetalType>_<HEX>_<Engine> - Dielectric/Transmissive:
DE|TR_<Finish>_<ColorFamily>_<HEX>_<Engine> - Lenses:
LN_<Finish>_<ColorFamily>_<HEX>_<Shade>_<Engine> - Decal:
DC_<Finish>_<ColorFamily>_<HEX>_<PatternCode>_<Engine>
- Metal:
8. Viewport color is updated
- Updates viewport preview:
diffuse_color = (BaseColorRGB, Alpha)where Alpha may be derived from Transmission Weightmetallicandroughnesscopied from Principled BSDF inputs Useful to better detect the correct material even in Solid Preview in the 3D Viewport.
Troubleshooting
- If there are no material on the object the operator stops because it need to have a material to rename.
- If there are no Principled BSDF in the selected material the operator stops because it need to have a Principled BSDF to get some data.
- If the final name is already present in the file the operator stops because there cannot be two materials with the same name.
- If the Decal brand/pattern list is empty, make sure that the PC is connected to the Internet and to
Workdriveand ensurecsv_datais loaded before running the script.