Setup
Author: Vincenzo Mossuto Creation Date: 29/09/2025
Last Reviewer: Sara Altomare/Rossana Mazza
What it is
This document describes the New model Setup section included in the Spaarkly Scripts add-on for Blender:
- Setup
Running this scripts immediately after importing a new eyewear model ensures that the scene is clean, correctly aligned, and ready for subsequent pipeline steps.
Specifically the setup scripts streamlines the workflow by:
- Removing unnecessary objects such as duplicates and empties.
- Normalizing origins and transforms, ensuring components are properly placed.
- Aligning the model to Blender’s world axes for consistency across projects.
- Preparing glasses for downstream tasks like naming, shading, rigging, and animation.
Setup
What it does
This operator prepares a freshly imported glasses model (typically in FBX format) by cleaning unnecessary objects, resetting transforms, and orienting it correctly in the scene.
It ensures that the model is ready for subsequent modeling, rigging, and shading tasks without redundant data or misalignment.
Prerequisite
- All the objects should be selected.
- There should be no important objects above
Z = 0.07or belowZ = 0
Steps
-
Import the glasses model (FBX) into Blender.
- Start by loading the eyewear FBX into your scene.
-
Select all parts of the imported model.
- The script will only run if at least one object is selected.
-
Open the Spaarkly Scripts panel → Setup.
- Locate the Setup New Model operator.
-
Click Setup New Model.
- The script will automatically:
- Clear parent relationships while keeping transforms intact.
- Reset origins of all selected objects to their geometry (median).
- Filter and remove unnecessary objects:
- Deletes all
EMPTYobjects. - Removes any objects above the height threshold (
Z > 0.07), typically duplicate models with closed temples.
- Deletes all
- Apply transforms by normalizing scale (keeping location and rotation).
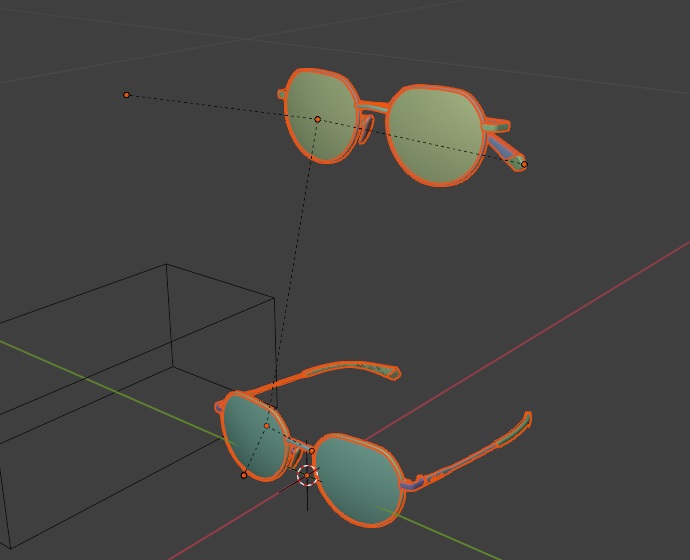
- Snap the 3D cursor to the scene center and set the pivot to 3D Cursor.
- Rotate the model by 90° on the Z axis to achieve correct orientation.
- Reset the pivot back to Median Point for normal operation.
- The script will automatically:
-
Verify results.
- Check in Front and Top views to confirm alignment.
- Ensure all essential parts remain below
Z = 0.07and that duplicates/empties have been removed.

Troubleshooting
- Nothing happens → Ensure at least one object is selected before running the script.
- Important parts removed → If valid geometry is placed above
Z = 0.07, lower it before running the script or adjust the threshold in the code. - Useless parts not removed → If useless geometry is placed under the main model it will not be removed automatically, removing it manually is the easiest way to do it.
- Model orientation incorrect → Double-check if multiple rotations were applied; you may need to undo and re-run.