Rigging and Animation
Author: Vincenzo Mossuto Creation Date: 30/09/2025
Last Reviewer: Sara Altomare/Rossana Mazza
What it is
This document describes all the scripts in the Rigging & Animation section included in the Spaarkly Scripts add-on for Blender:
- Create Armature
- Set View
- Generate gummy armature
These scripts are designed to automate the rigging process and prepare eyewear models for animation.
They cover the different stages of rig creation: from generating a standard armature, aligning the viewport for correct bone placement, and building flexible rigs for gummy glasses.
See the Animation section for detailed guidelines and best practices.
Create Armature
What it does
This operator creates a standard armature where each selected mesh object is assigned to its own bone.
The bones are placed at the geometric centroid of each mesh, named after the corresponding object, and the parenting with vertex groups is set up automatically.
This tool provides a quick way to prepare objects for animation or testing by giving them a clean rig structure without manual armature creation.
Prerequisites
- At least one mesh object must be selected in Object Mode.
- Objects should follow Spaarkly’s naming conventions to ensure clarity when bones are created.
- The scene must not contain an existing armature you want to preserve, since the tool generates a new one.
Steps
-
Select the components
Choose the mesh objects you want to include in the armature. -
Run the script
Click on Create Armature (Standard-Armature tool) from the Rigging section. -
Automatic setup
- A new armature is created at the world origin.
- The default bone is deleted.
- A new bone is generated for each selected mesh.
- Each bone is positioned at the centroid of its corresponding mesh.
- Meshes are parented to the armature with Automatic Weights using vertex groups that match bone names.
-
Result
You now have an armature with one bone per object, properly linked and ready for posing or animation.
Troubleshooting
- No objects selected → The tool won’t run. Make sure you have one or more meshes selected.
- Wrong object types → The operator ignores non-mesh objects (lights, empties, etc.).
- Unexpected deformation → Check that vertex groups were correctly created and that no modifiers interfere.
- Armature already exists → If you need a fresh rig, delete the existing armature before running the tool.
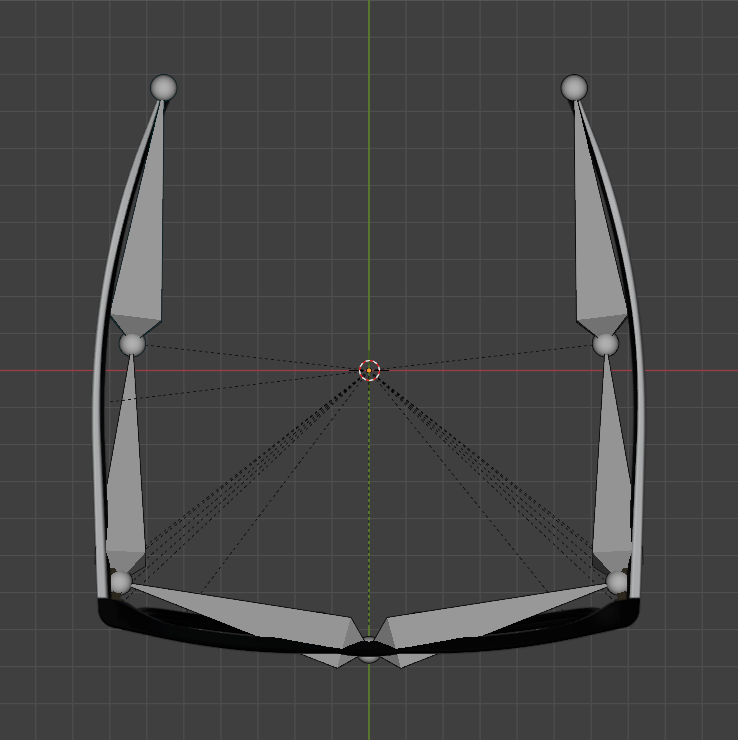
Set View
What it does
This operator prepares the 3D viewport by automatically centering on the selection and switching to orthographic top view.
It is designed as a preparatory step before running the Create Gummy Armature operator, ensuring the scene is aligned and framed correctly while the script is performing the gradient weight-paint action.
Prerequisites
- At least one object must be selected in the 3D Viewport.
Steps
- Select the object(s) you want to frame.
- Run Top View Set from the Rigging panel.
- The script will:
- Center the view on the 3D cursor.
- Frame only the selected objects.
- Switch the viewport to orthographic top view.
Troubleshooting
- No selection → The operator won’t adjust the viewport. Make sure at least one object is selected.
- Wrong editor → The command only works in the 3D Viewport, not in other editors.
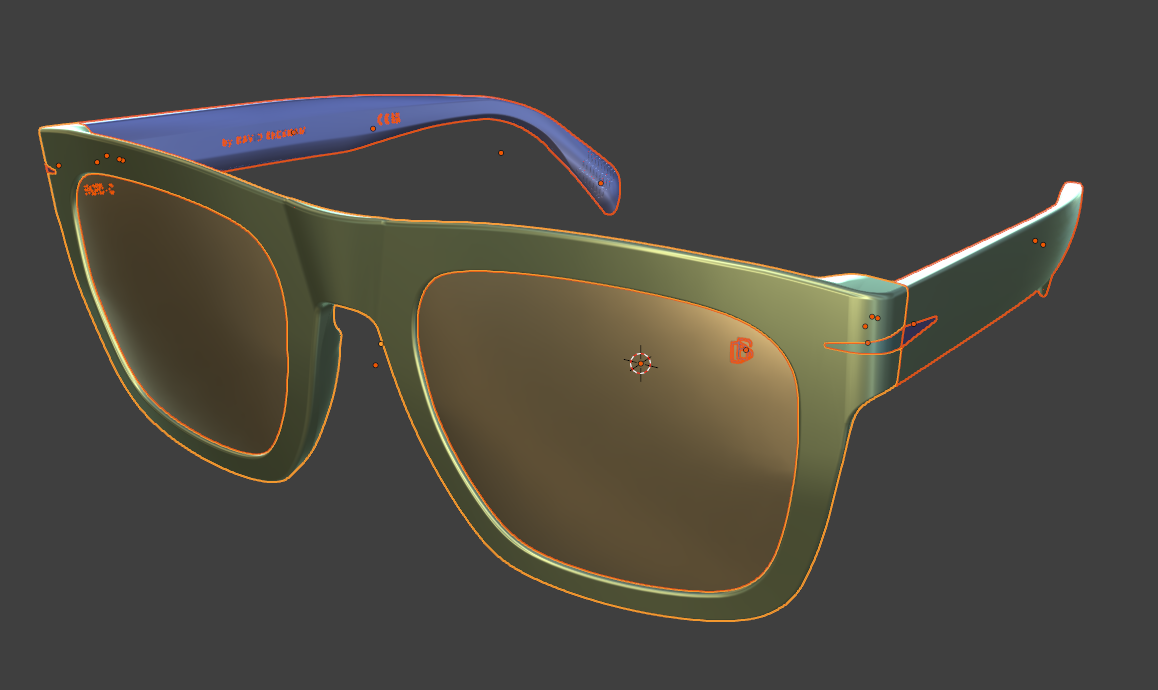
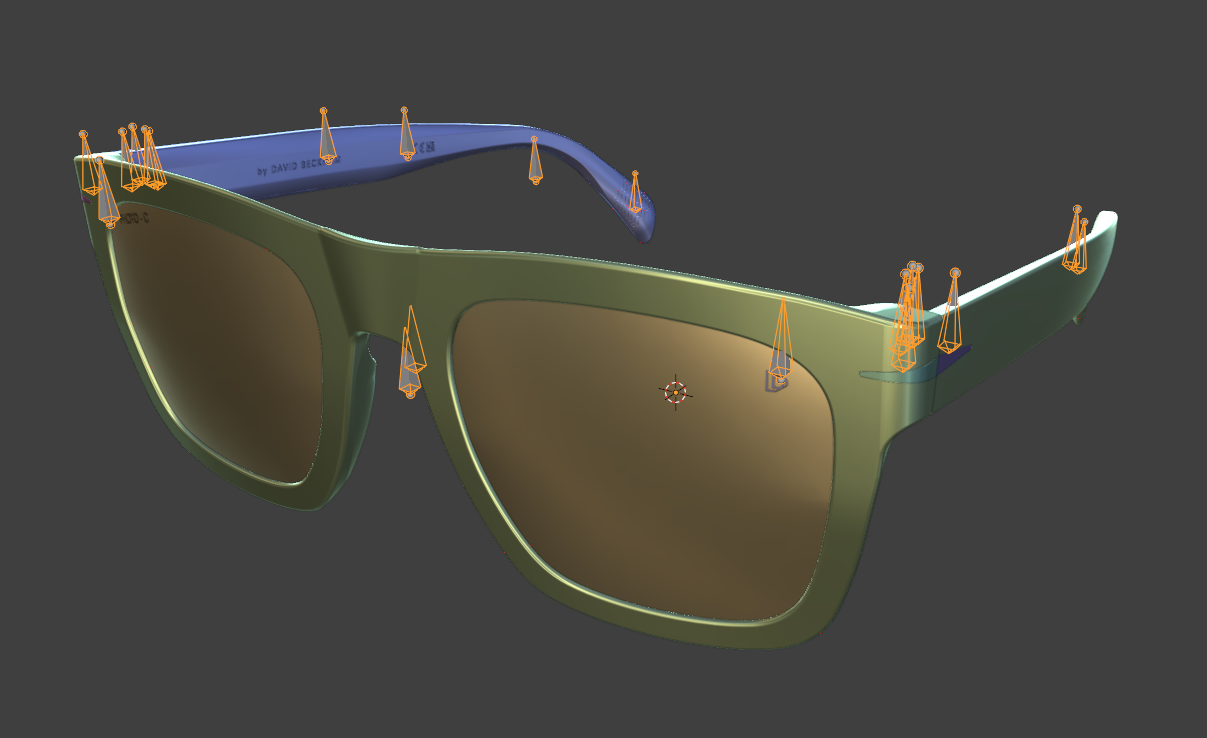
Create gummy armature
What it does
Builds a dedicated Flex_Armature for flexible (“gummy”) eyewear and assigns gradient weights for smooth deformation.
From the current selection, it:
- Converts selected objects to MESH.
- Detects screw positions (
SR_* _SX/_DX) and creates front bones FF_SX / FF_DX from the lens centerline (x=0) to those screws. - Creates temple bones SX / SX_TIP and DX / DX_TIP from screws to temple tips, with automatic tip detection.
- Applies vertex groups and weight gradients (via
coord_converter) to front and temple meshes. - Adds Armature modifiers (preserve volume) and parents screws to front bones using BONE_RELATIVE.
- Parents front bones to temple bones (
bone_parent) and triggers an auto animation setup (flex_glasses_an).
Prerequisites
- Select all relevant parts of one model inside the same Collection (the tool restricts to the active object’s collection).
- Components must be properly named:
- Frame front:
FF_* - Temples:
TM_* _SXandTM_* _DX - Screws:
SR_* _SXandSR_* _DX
- Frame front:
- Run Top View Set first (orthographic top view) to ensure correct gradient directions.
- External helpers expected to exist:
coord_converter,bone_parent,flex_glasses_an.
Steps
- Select the model components (front, temples, screws; optional tips/decals/rivets/wirecores) in the same Collection.
- Run Generate Custom Armature.
- The operator will:
- Convert selection to Mesh and limit the working set to the active object’s Collection.
- Read screw positions (
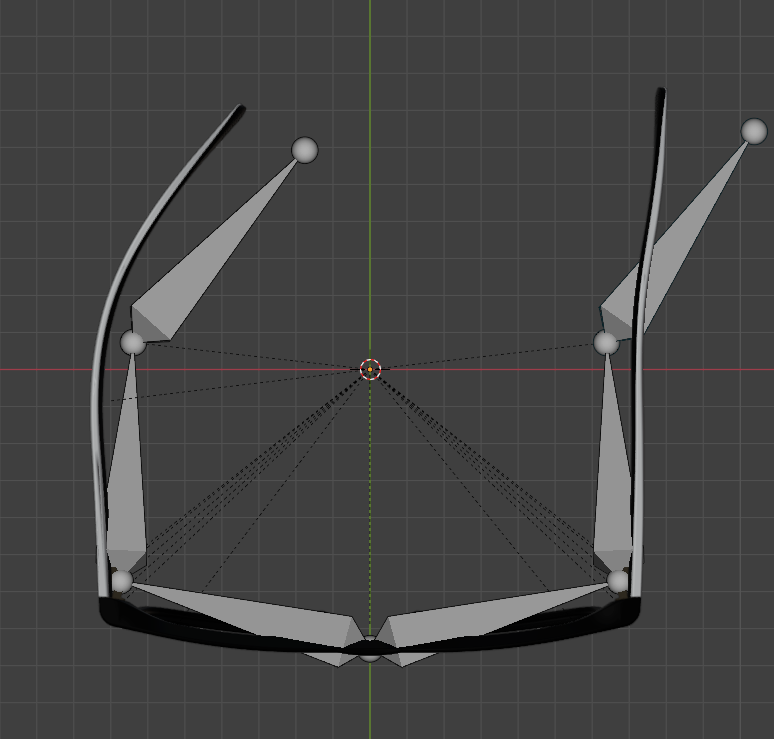
SR_* _SX/_DX) and analyze the front’s x=0 centerline. - Create armature Flex_Armature with bones:
FF_SXandFF_DX(centerline → each screw).SX→SX_TIP(left temple chain).DX→DX_TIP(right temple chain).
- Auto-assign vertex groups and paint linear weight gradients for:
- Front:
FF_SX,FF_DX - Temples:
SX,SX_TIP,DX,DX_TIP
- Front:
- Add Armature modifiers (Preserve Volume) and clean extra vertex groups.
- Parent screws to front bones with Bone Relative.
- Link front/temple bones (
bone_parent) and generate animation (flex_glasses_an).
- The new Flex_Armature is linked back to the active Collection; transform pivot resets to Median Point.
Troubleshooting
- Nothing happens / wrong set of objects → Ensure all targets are in the same Collection as the active object; the tool filters to that Collection.
- Missing screws → Names must include
SR_with_SX/_DX. Without them, front/temple chains can’t be built correctly. - Wrong bone directions / gradients → Run Top View Set to switch to orthographic top before generating the rig.
- Weights look off → Confirm
coord_converter,bone_parent, andflex_glasses_anare available and that objects are named exactly as expected.