Quick Start Guide
Last Update: 16/01/2026
This guide will walk you step-by-step through activating Virtual Try-On (VTO) on your Shopify store. The process is designed to be fast and intuitive, allowing you to go online in just a few minutes.
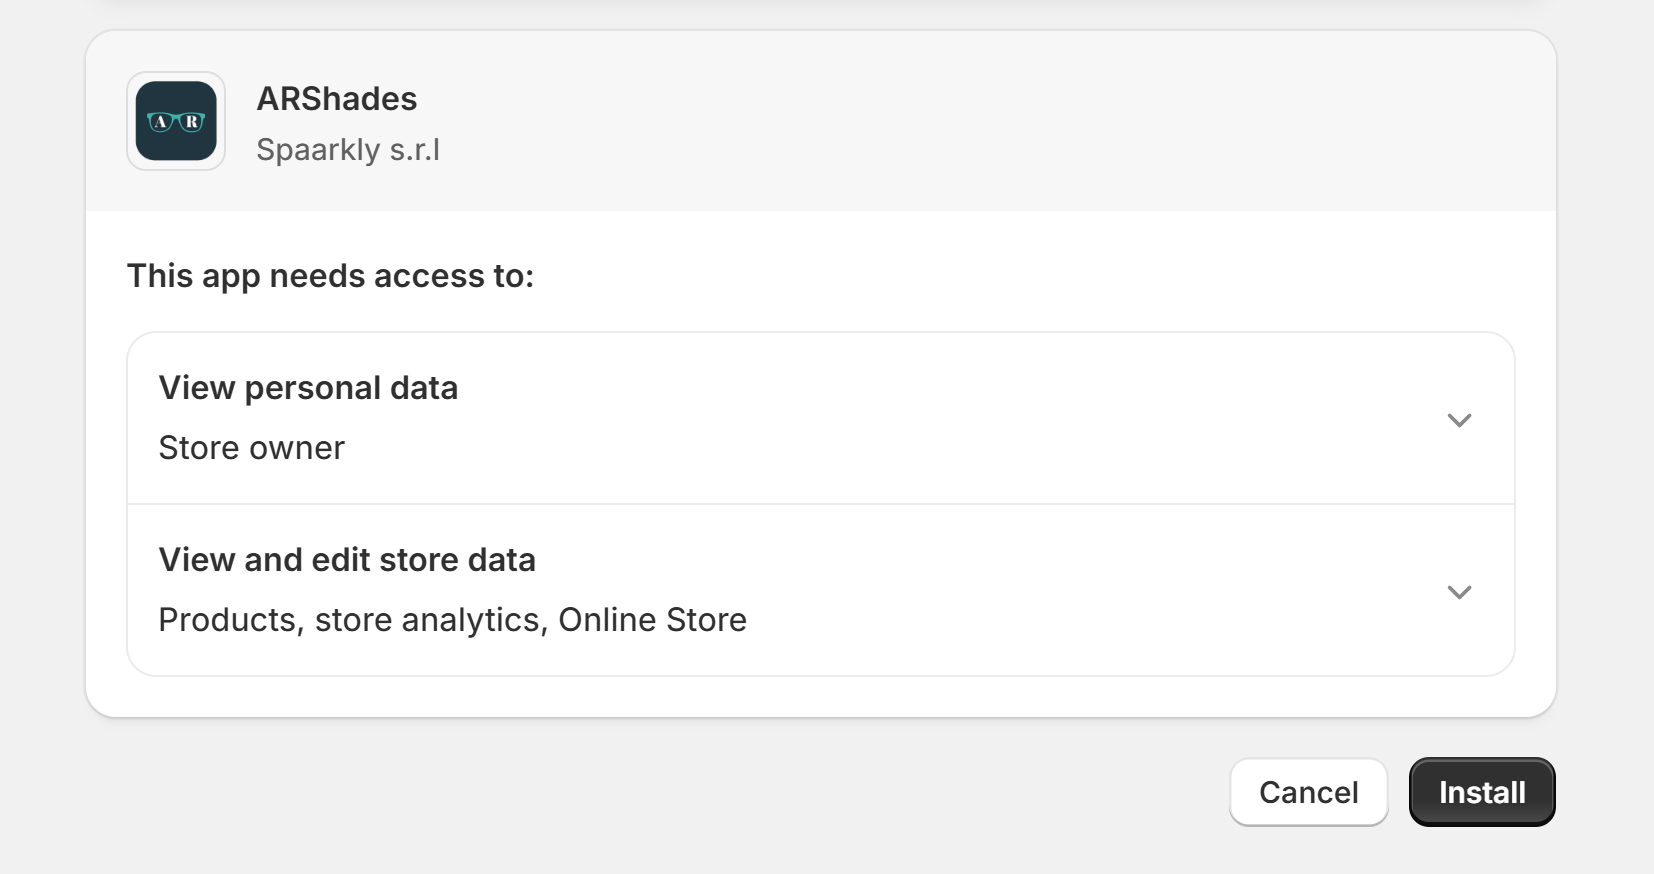
1. App Installation
The ARShades plugin is distributed as a Custom App. To begin, use the Installation Link provided directly by our team.
Clicking the link will redirect you to your Shopify admin panel. Here, you simply need to confirm the installation by clicking the dedicated button in the bottom right.
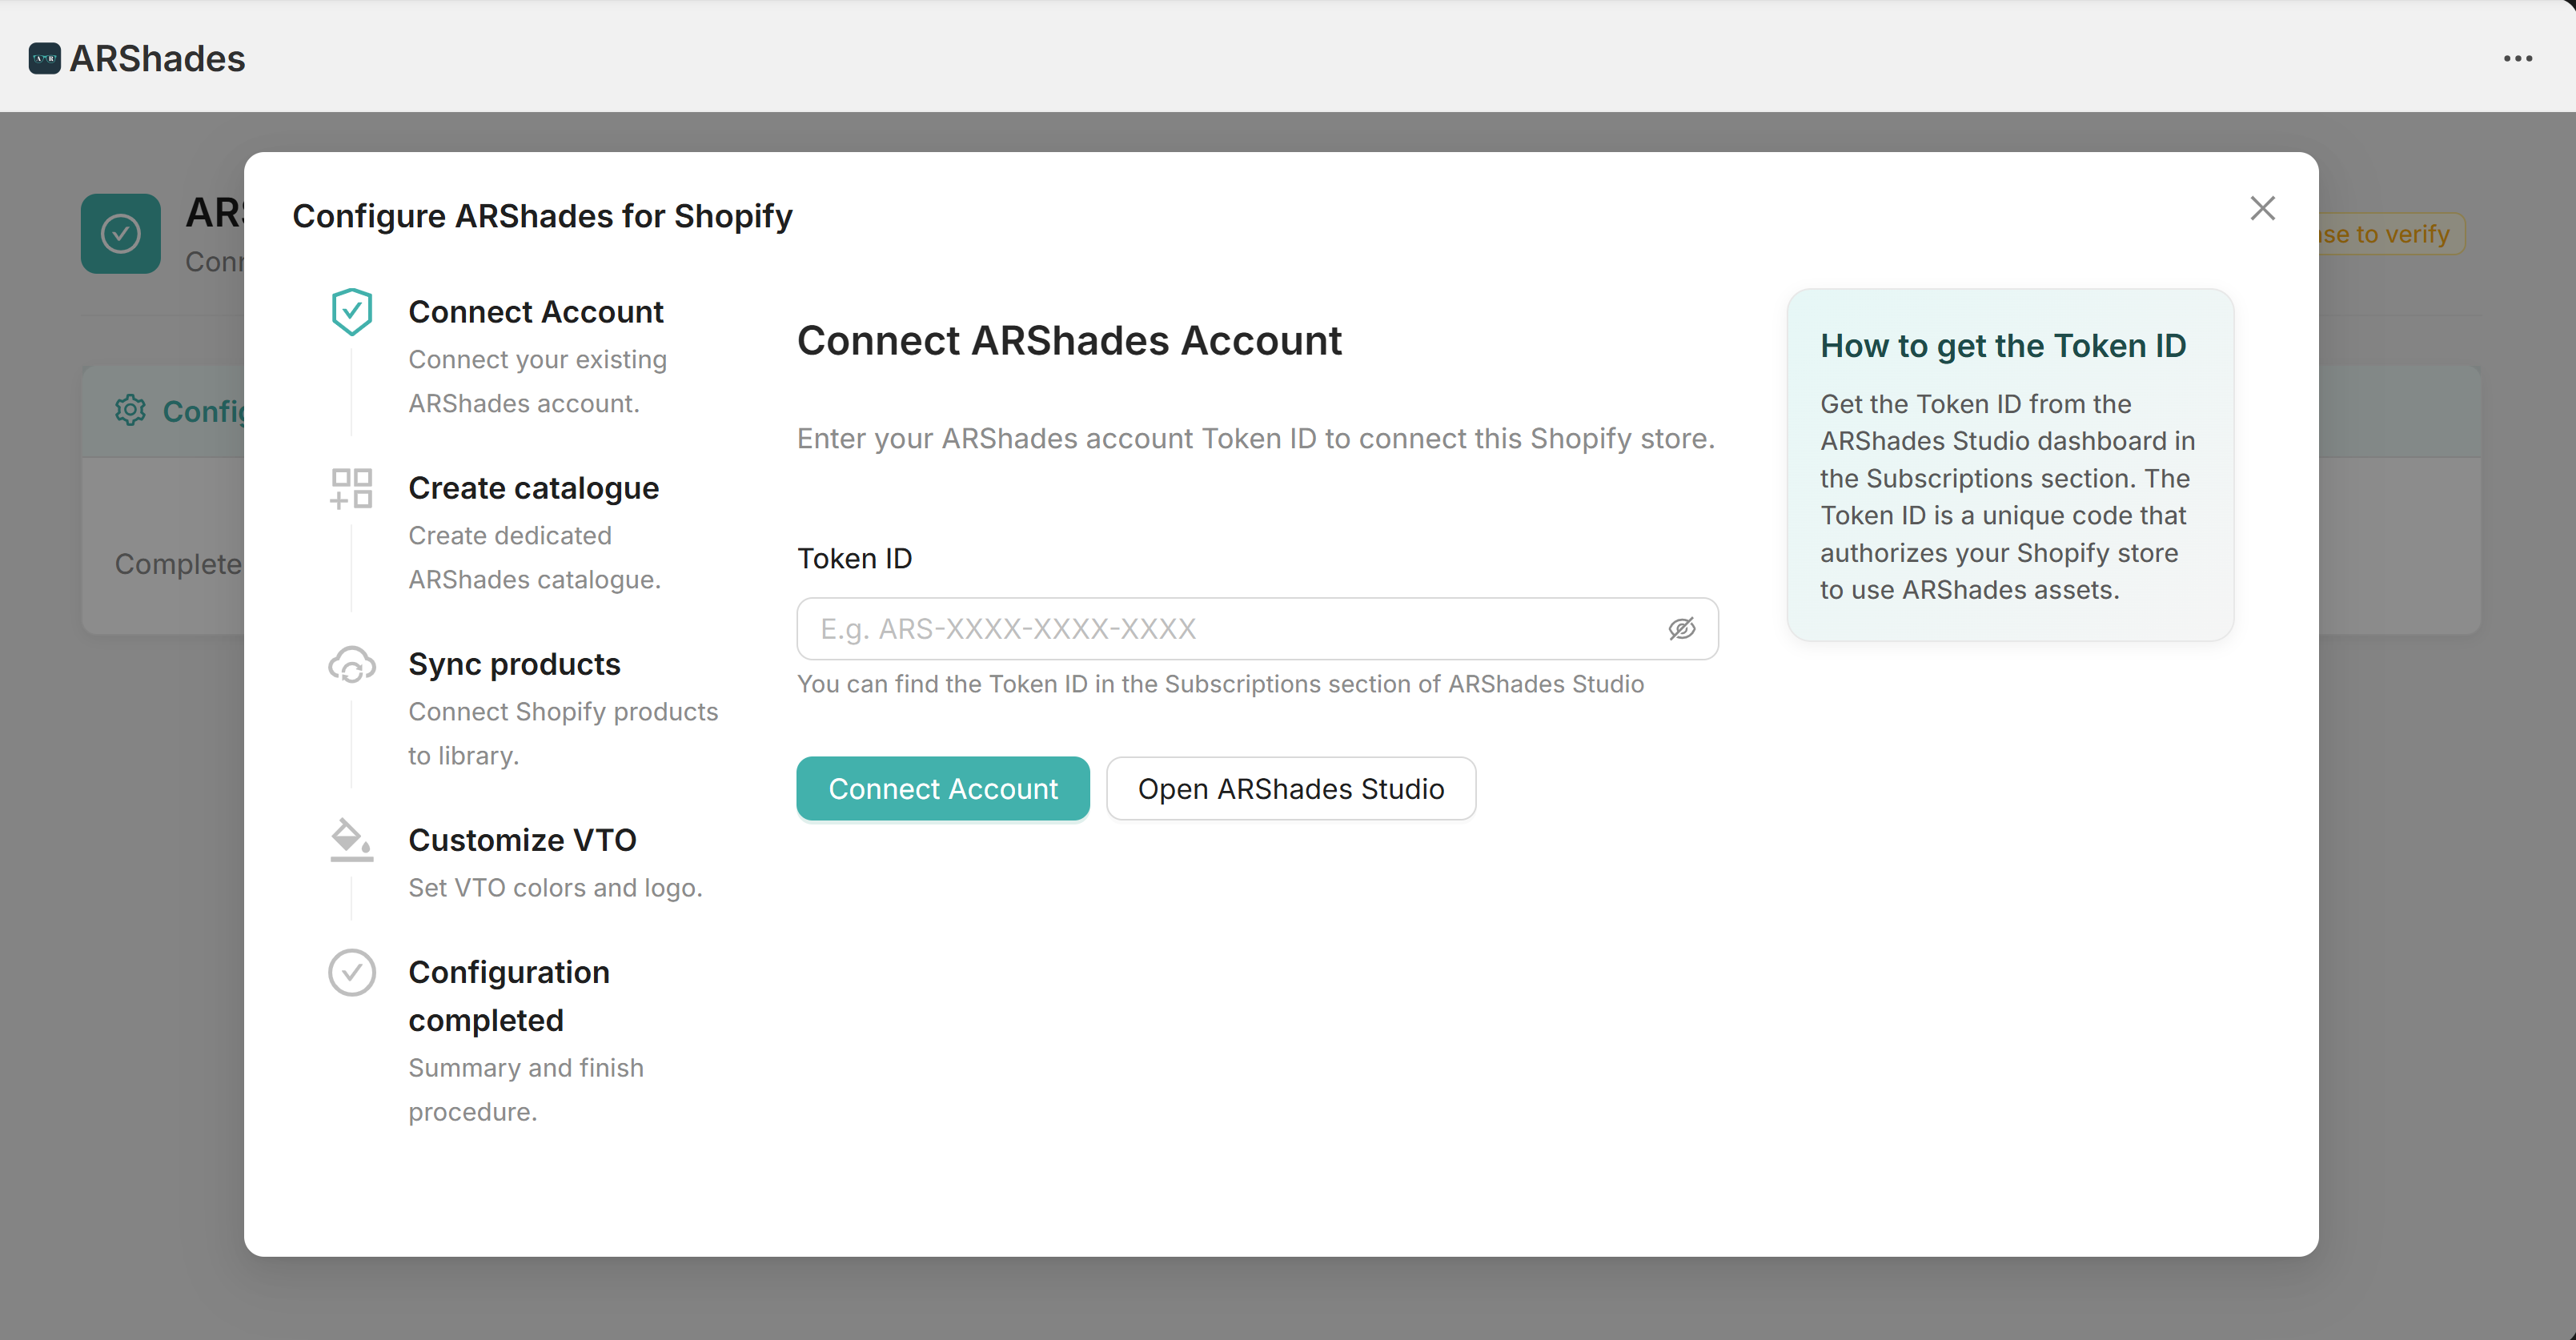
2. Setup Wizard
Upon first launch, the app will welcome you with a wizard divided into five simple steps.
Step 1: Licence Activation
The first thing to do is link the plugin to your ARShades subscription. Enter your Licence Token in the appropriate field and click on Connect Account.
To learn how to retrieve your Licence Token from ARShades Studio, refer to the VTO & 3D Viewer License guide.
If the code is correct, you will be able to proceed to step 2.
Step 2: Catalogue Creation
Now we need to create a container for your products. Enter a name of your choice for the catalogue (e.g., "My E-commerce") and confirm by clicking Create catalogue. This will create the link between Shopify and the ARShades database.

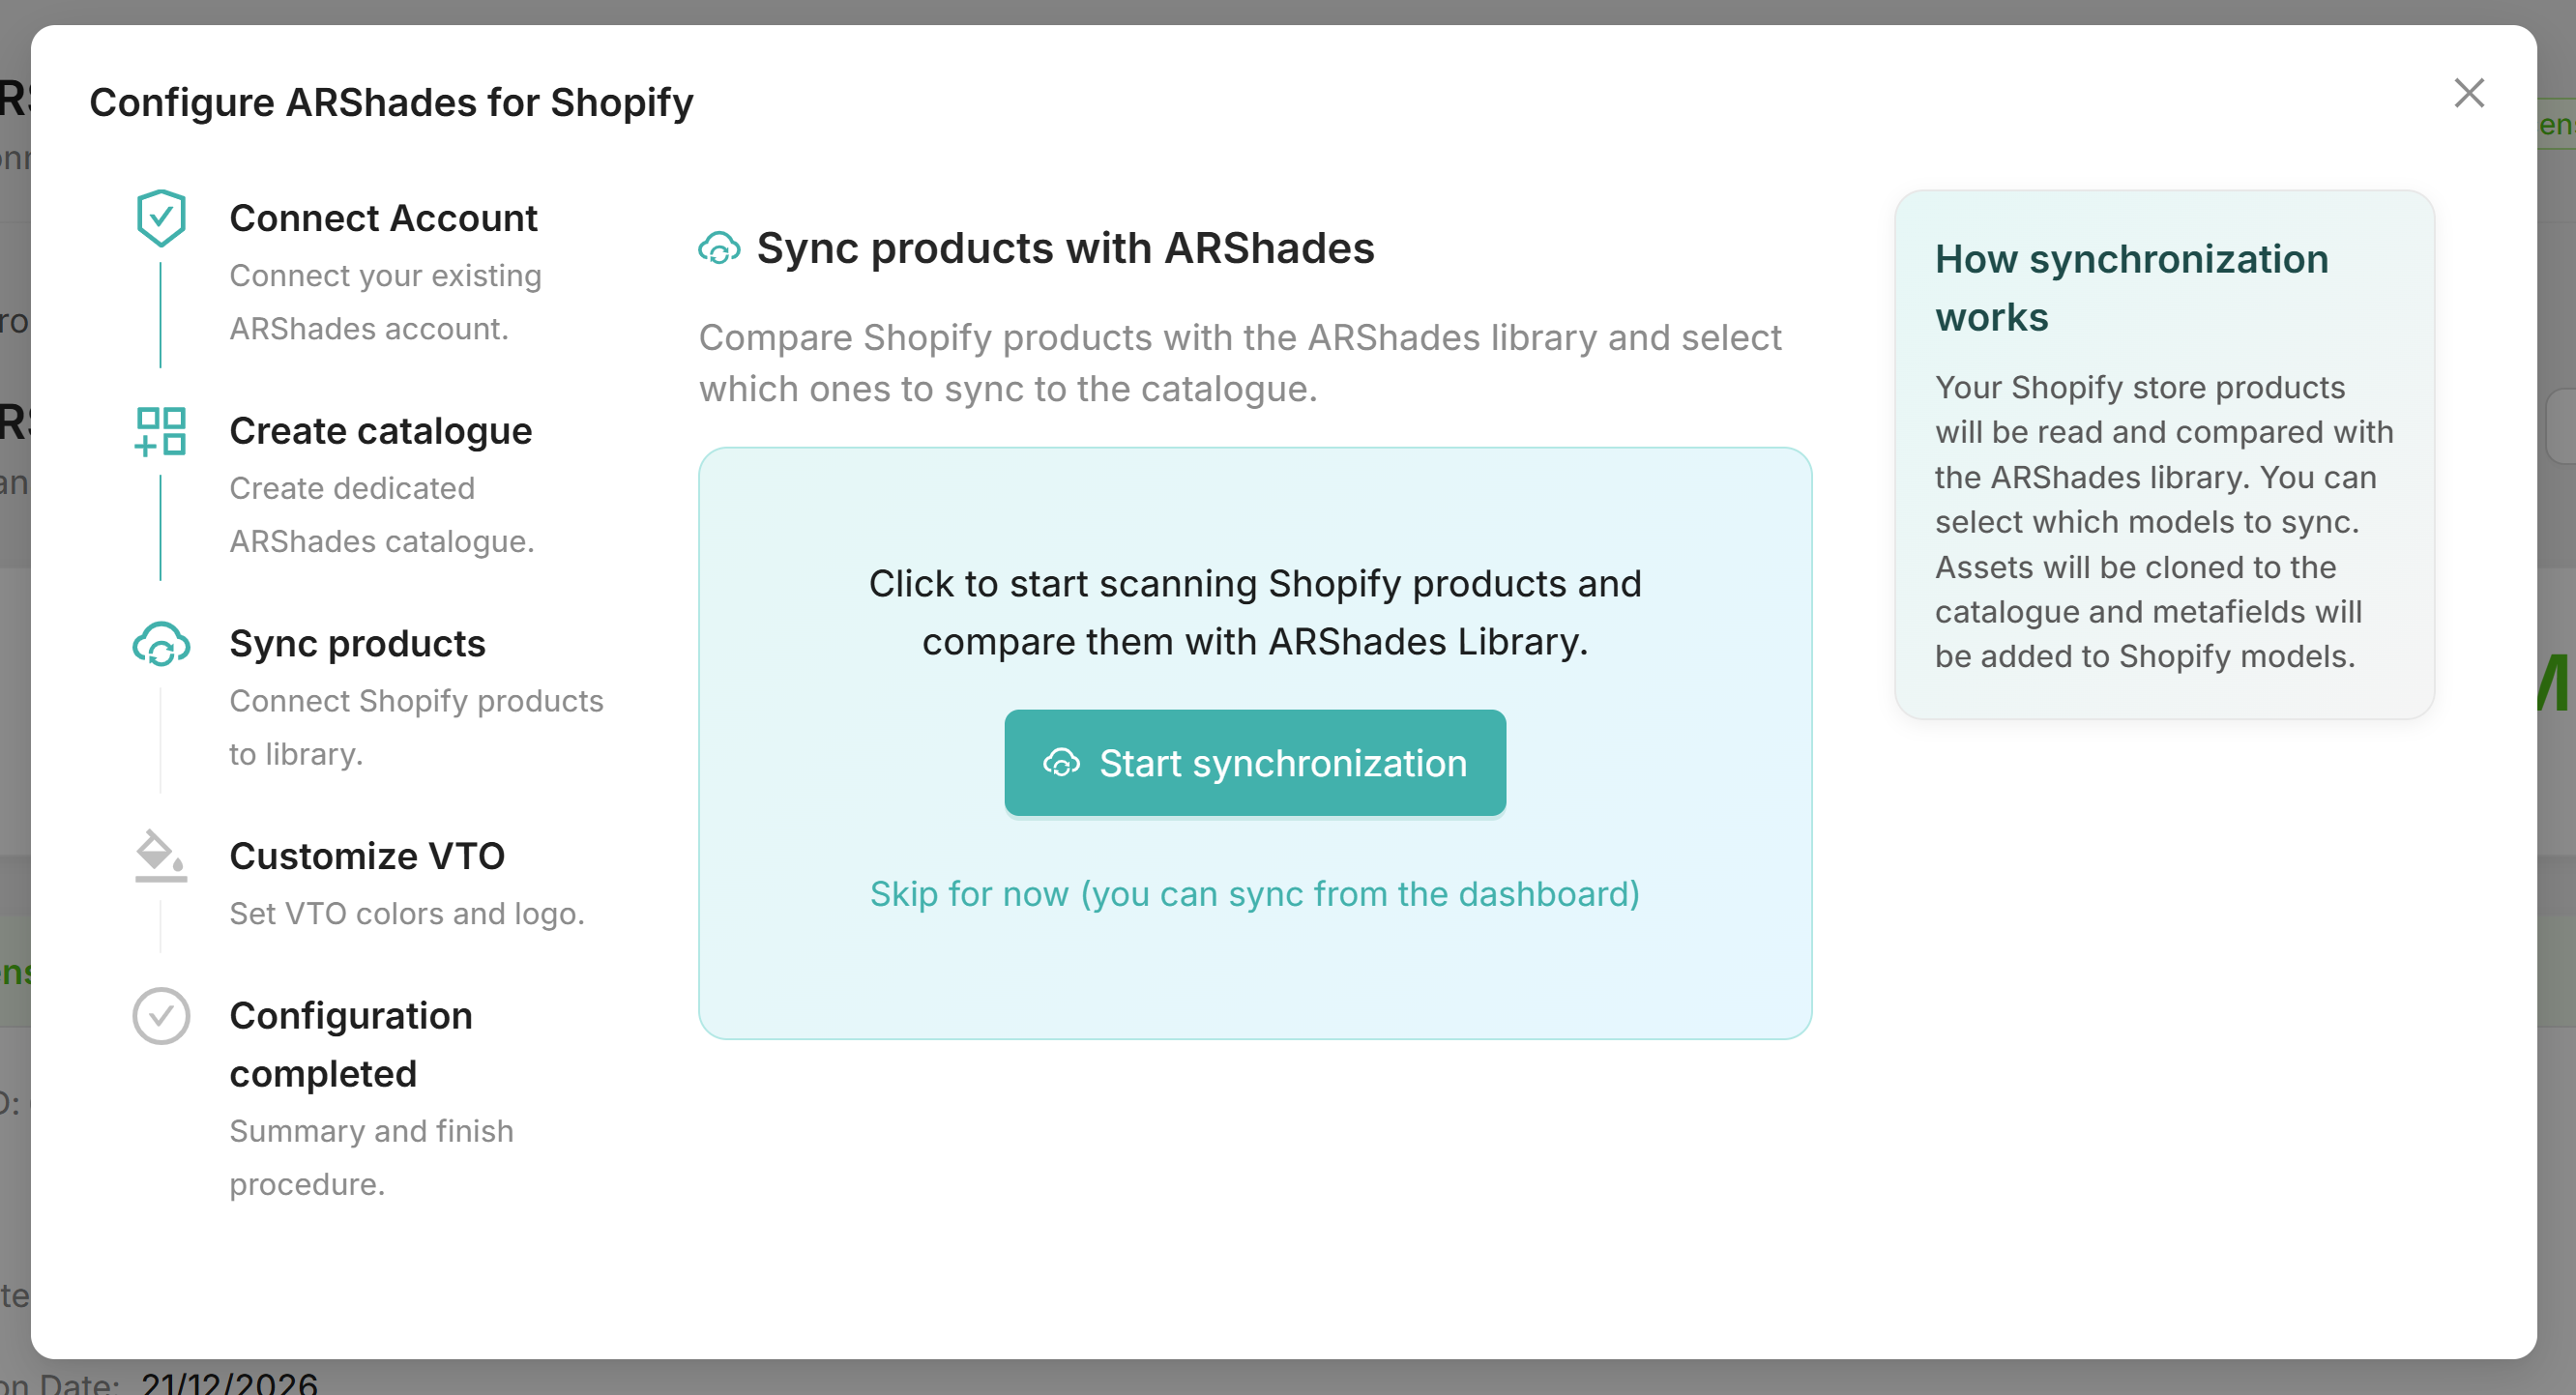
Step 3: Product Synchronisation
In this phase, the system scans your store for compatible products. Click on Start scan to populate the table.
The system will show you which products in your store have a corresponding 3D model in our database (marked with the green status Available). Select the products you wish to activate by ticking the boxes on the left and finish by clicking Sync models.
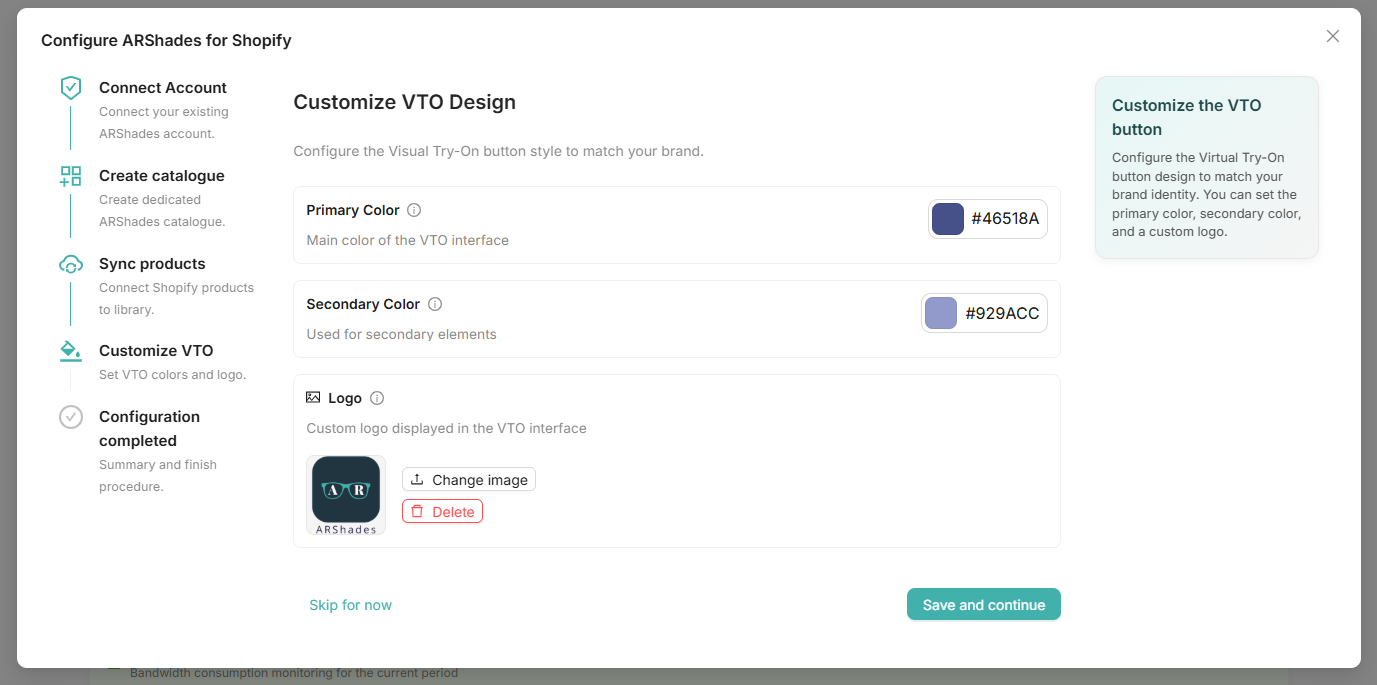
Step 4: Design Customisation
Before finishing, you can adapt the VTO player's appearance to your brand colours. In this screen, you can define the Primary Colour and the Secondary Colour of the VTO interface. Once satisfied, click on Save and continue to finish the initial configuration.
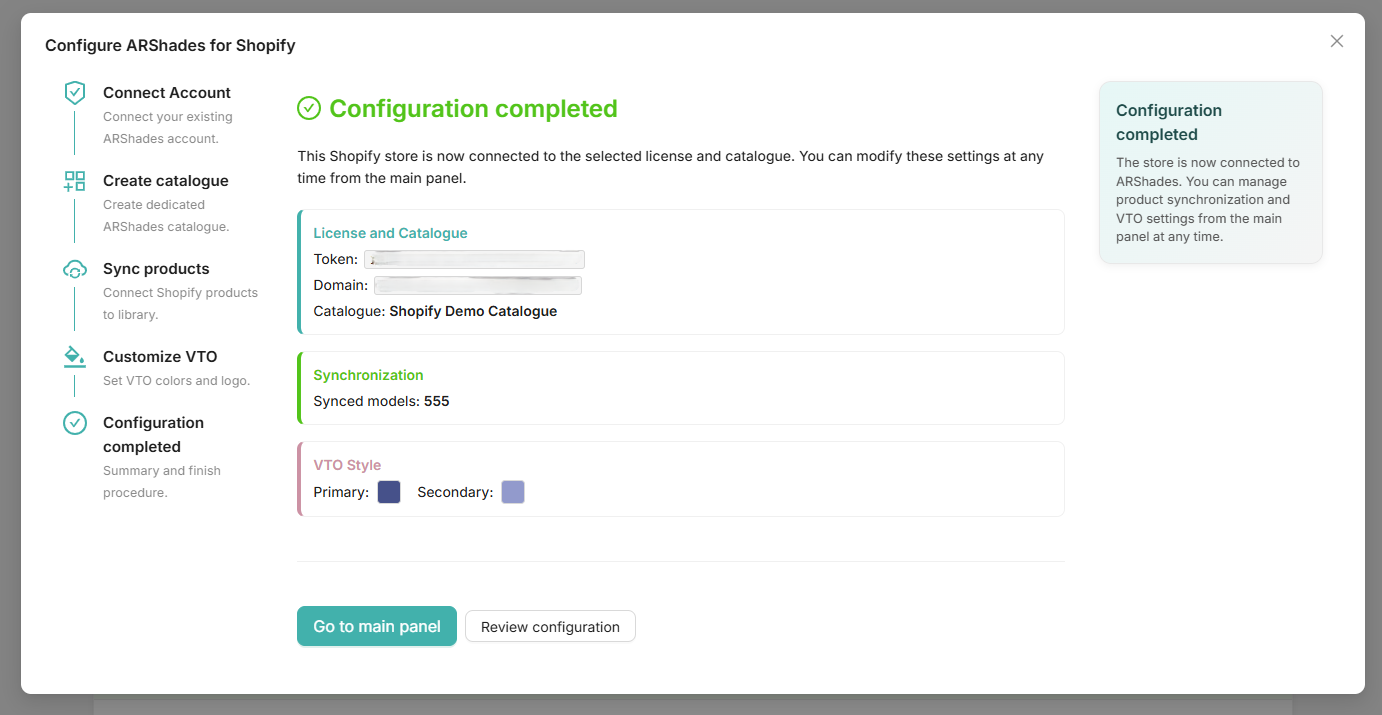
Step 5: Configuration Completed
At the end of the wizard, you will see a summary screen confirming the success of all operations. From here, you can access the main Dashboard directly or proceed to activate the plugin on your Shopify theme.
3. Activation on Site
Now that the products are synchronised, the final step is to make the "Virtual Try-On" button visible to your customers. This operation takes place entirely within the Shopify visual editor, without touching any code.
From your admin panel, go to Online Store > Themes and click on Customise. In the dropdown menu at the top, navigate to the Products > Default product page.
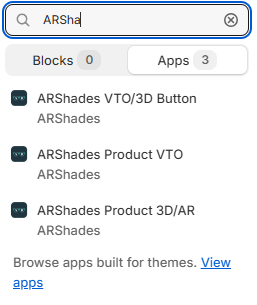
In the left-hand column, click on Add block and search for ARShades Product VTO. Drag the block to your preferred position, for example, above the "Add to cart" button, and remember to Save the changes.
Congratulations! Virtual Try-On is now active. Visit the page of one of the synchronised products on your live site to try the experience immediately.