Material Presets
Author: Sara Altomare Creation Date: 19/09/2025
Last Reviewer: Vincenzo Mossuto
What It Is
Material Presets are predefined configurations of materials (color, transparency, reflectivity, texture, etc.) that can be applied to 3D models to speed up the workflow and ensure visual consistency across assets.
In our workflow, Material Presets are mainly used for managing eyeglass lenses.
Accessing To Material Presets
To use presets:
-
Open the Variant MODEL_CODE_001_FRAME_COLOR Details page of an eyeglass model.
-
In the 3D viewer window, next to the
Try On VTOcommand, clickCustom Preset. -
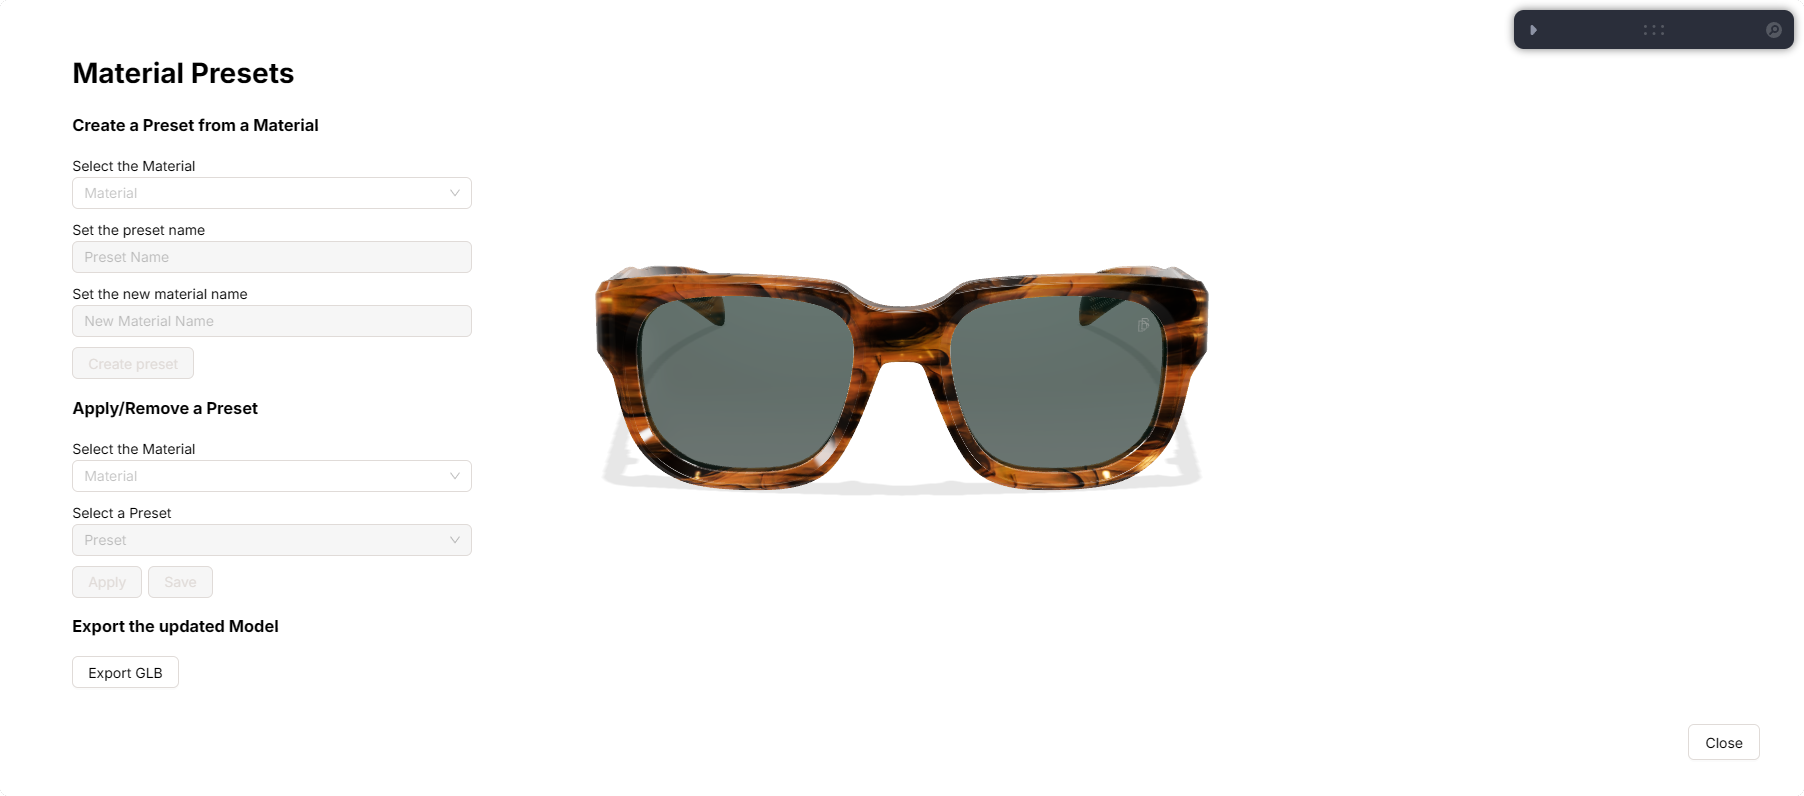
The Material Presets window will open, structured into three main areas:
- 3D Asset in the center:
displays the 3D model of the asset, in our case the eyeglass, allowing you to observe the applied changes in real time. - Material Window on the right:
shows the list of materials applied to the model and includes theClosecommand. - Material Presets Panel on the left:
contains the panel divided into three sections, each with specific functions.
- 3D Asset in the center:
Using The Three Areas
1. 3D Asset Area
Displays the eyeglass model in real time, showing how it changes when a preset is applied.
This is especially useful for verifying lenses and their material effects.
2. Material Window Area
The right-hand dropdown allows you to:
- view all materials associated with the model, using the correct naming convention;
- edit them in real time (Base Color, Roughness, Metalness, etc.);
- create a new preset starting from a modified material;
3. Material Presets Panel Area
The left area is further divided into three sections and is used as follows:
-
Create Preset from Material
- Select an existing material from the eyeglass model.
- Assign the correct name following the official
Namingconvention. - Click
Create Presetto save it and add it to the preset list for future use.
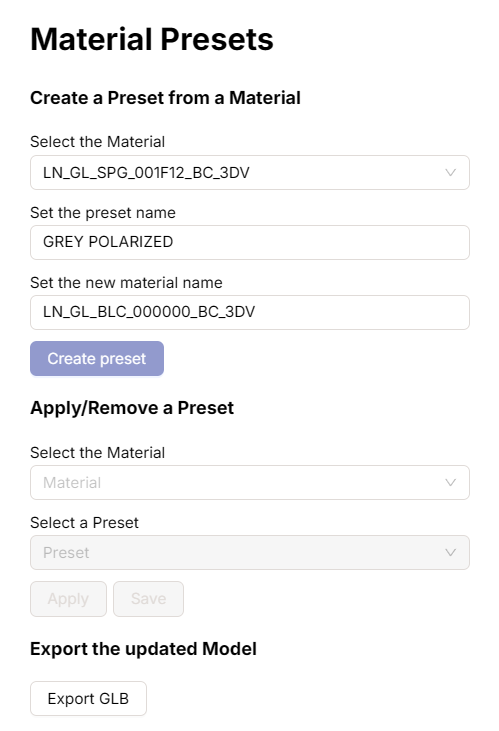
Note: in this case, it is not only possible to apply an existing material to the eyeglass, but you can also create a new preset by directly modifying a material of the eyeglass, using the material dropdown located in the right area of the window.”
-
Apply / Remove Preset
- Select a material (e.g., a lens material).
- Choose a preset from the list.
- Click
Apply→ the material will adopt the selected preset.- After application, the button changes to
Remove, allowing the preset to be removed if necessary.
- After application, the button changes to
- Confirm changes by clicking
Save.

-
Export the Updated Model
Once all desired presets are applied, click Export GLB.
Two models will be automatically downloaded:
- FULL → complete eyeglass model
- CUT → eyeglass model with temples cut
- It is essential that both models:
- follow the correct
Namingconvention, - have the same materials applied to the same components.
- follow the correct
Note: mirrored lenses usually have two distinct materials, the front and the back. Therefore, if you want to include a mirrored lens in the uploaded eyeglass, it is recommended during
Uploadto provide the lens already divided into two separate materials, corresponding to the front and back parts of the lens.